Uploading Symbol Files
The Embrace SDK allows you to view both native and JavaScript stack traces for crashes and error logs. These stack traces, however, usually require symbol files to be able to make sense of them. For JavaScript, you'll need to upload source maps. For iOS, dSYM files, and the mapping file for Android.
Uploading Native And Javascript Symbol Files
If you used the setup script mentioned on the Adding the Embrace SDK page these changes have already been made for you.
- iOS
- Android
To enable automatic dSYM uploads, we will need to locate a number of items first:
- Your App ID. This is a 5 character code used to start Embrace. It was provided to you when you registered for an Embrace account.
- Your API token. This is a longer character string. You can find it in the dashboard on the settings page, under the API section.
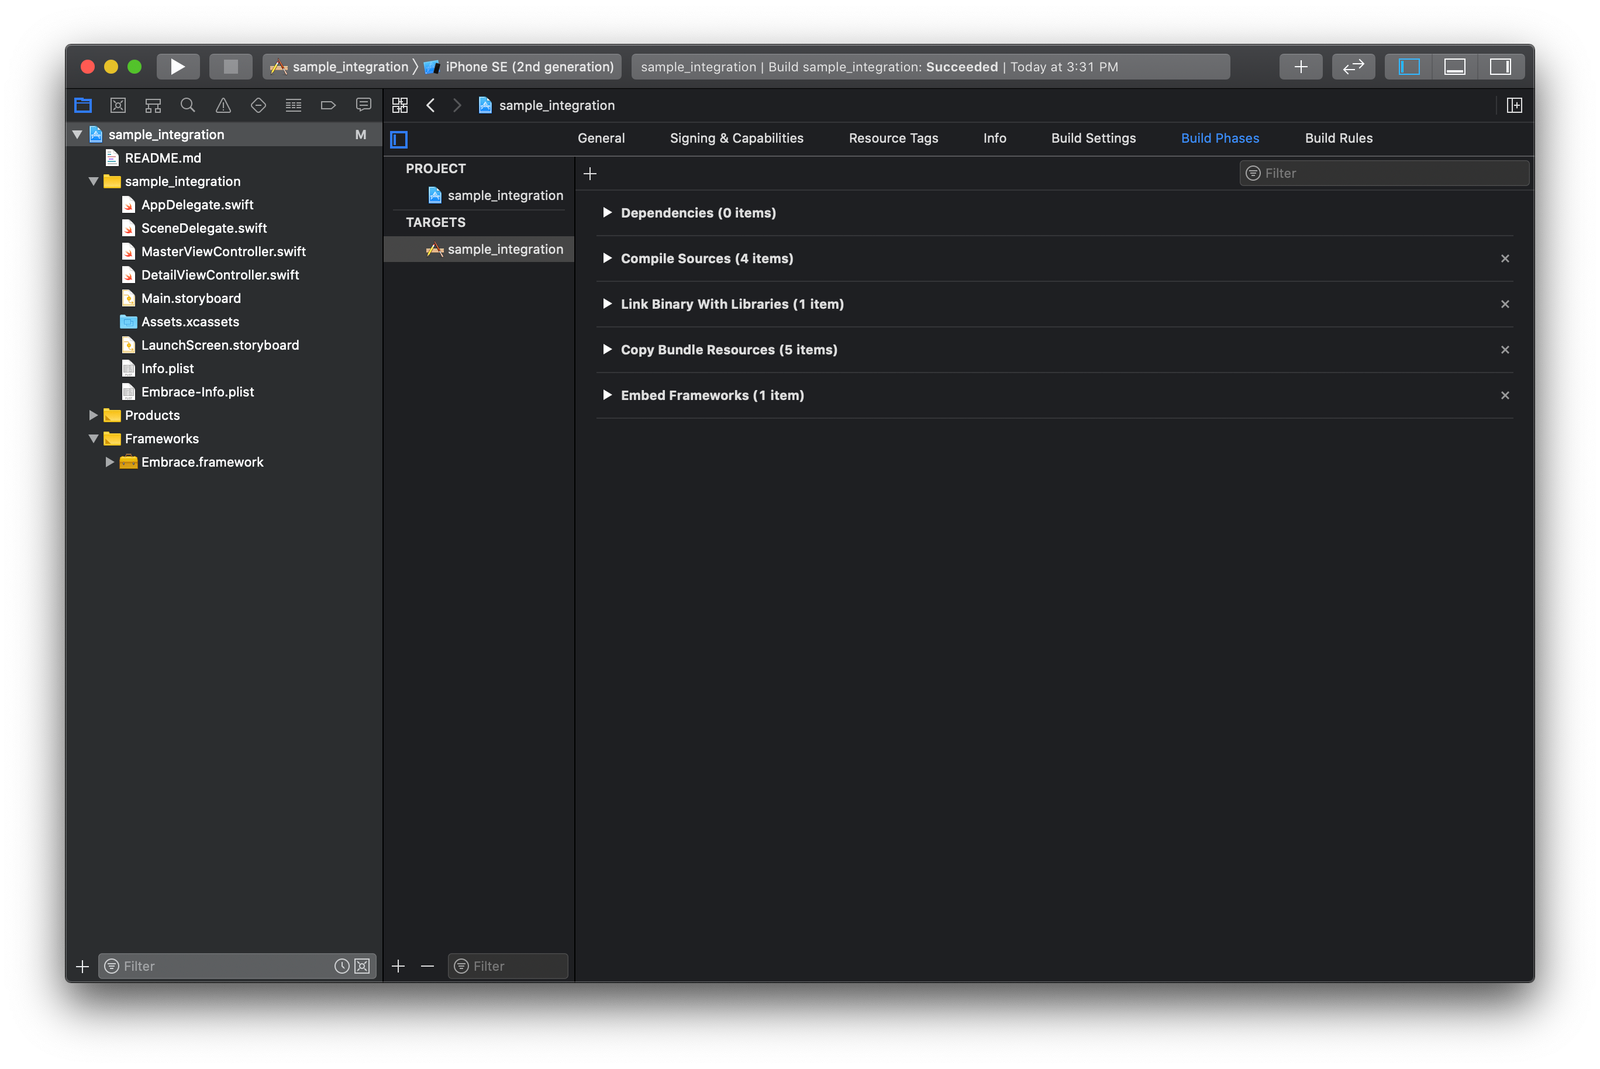
In Xcode, find the "Bundle React Native code and images" step in the Build Phases tab. The contents should look something like the following:
set -e

WITH_ENVIRONMENT="$REACT_NATIVE_PATH/scripts/xcode/with-environment.sh"
REACT_NATIVE_XCODE="$REACT_NATIVE_PATH/scripts/react-native-xcode.sh"

/bin/sh -c "$WITH_ENVIRONMENT $REACT_NATIVE_XCODE"
Change the contents to the following:
set -e

WITH_ENVIRONMENT="$REACT_NATIVE_PATH/scripts/xcode/with-environment.sh"

# Add these two lines
mkdir -p "$CONFIGURATION_BUILD_DIR/embrace-assets"
export SOURCEMAP_FILE="$CONFIGURATION_BUILD_DIR/embrace-assets/main.jsbundle.map"

REACT_NATIVE_XCODE="$REACT_NATIVE_PATH/scripts/react-native-xcode.sh"

/bin/sh -c "$WITH_ENVIRONMENT $REACT_NATIVE_XCODE"
Note that for Expo apps this build phase looks quite different but the same process will work just make sure to add
the new lines above the invocation of react-native-xcode.sh which on Expo will look something like
"$NODE_BINARY" --print "require('path').dirname(require.resolve('react-native/package.json')) + '/scripts/react-native-xcode.sh'"
Now we will add a new phase:

Use the "+" button on this tab to add a new "Run Script" phase. Name the phase "Embrace Symbol Uploads".
This phase is going to be calling Embrace's run.sh upload script which is distributed alongside the Embrace CocoaPod.
Use the following command for the build phase:
REACT_NATIVE_MAP_PATH="$CONFIGURATION_BUILD_DIR/embrace-assets/main.jsbundle.map" EMBRACE_ID=USE_YOUR_APP_ID EMBRACE_TOKEN=USE_YOUR_TOKEN "${PODS_ROOT}/EmbraceIO/run.sh"
You can configure the phase to only run on builds you want symbols uploaded to Embrace for, and skip the step on internal only builds to save time.
Proguard files will be uploaded automatically. If you don’t see symbolicated crashes while using Proguard, reach out to us and we’ll work with you directly.
By default, source maps are uploaded only for the release variant. If you'd like to upload source maps for other
variants you will need to adjust debuggableVariants in your app/build.gradle see React Native's documentation
for more details.
Symbolication with OTA updates
If you perform over-the-air (OTA) updates to your JavaScript code without submitting a new version to the App Store or Google Play Store you will need to perform a couple more steps to allow Embrace to symbolicate the stack traces on the updated bundle correctly.
First you must upload source maps for the new bundle using the upload script distributed with the Embrace Cocoapod:
# For macOS, use arch "darwin", for Linux use "linux.arm64" or "linux.amd64" (depending on your CPU)
ios/Pods/EmbraceIO/embrace_symbol_upload.<arch> --app <your app ID> --token <your token> --rn-bundle path/to/main.jsbundle --rn-map path/to/main.jsbundle.map
Next you must tell the Embrace SDK the location where it can find the downloaded bundle on the device when there are updates:
import {setJavaScriptBundlePath} from '@embrace-io/react-native';

setJavaScriptBundlePath(pathToBundle)
Now that you know how to upload symbol files to make sure stack traces are translated on the Dashboard, let's generate your first session.