This past year, Embrace embarked on an exciting project: integrating OpenTelemetry into our product for mobile developers. Our objective was to enhance the observability of mobile apps and gain detailed insights into their performance and behavior in real-time while following global conventions.
For context, Embrace provides native (Android and iOS) and hosted (React Native, Flutter, and Unity) SDKs to integrate into mobile applications. These SDKs allow developers to capture key telemetry about app sessions, which can be used to recreate user journeys and understand the app’s common patterns to improve the experience and performance.
We previously announced our fully open source, OpenTelemetry-compliant SDKs for Android and iOS, and we wanted to keep the ball rolling.
Our next milestone is granting the same capabilities to our hosted SDKs. As a member of the Embrace React Native SDK team, I’d like to share how we developed the idea to extend OpenTelemetry capabilities to React Native, and the journey we took to achieve our goal. I’ll outline the key steps and challenges we encountered along the way. Finally, I will walk you through how to use the proposed OpenTelemetry-compliant instrumentation we’ve created!
What is OpenTelemetry?
If you are not familiar with the key concepts of OpenTelemetry, here’s a small introduction: OpenTelemetry (OTel for short) is a set of tools and standards for observability. It helps developers generate, collect, and export telemetry data (e.g., traces, metrics, and logs) for analysis. The goal is for every instrumentation library to provide telemetry data across systems according to the same specification, making it easier to observe and understand application performance.
The initial plan
Our plan began with a phase of research and learning about OpenTelemetry. For this learning process, our team started with the basics, reading “Learning OpenTelemetry: Setting Up and Operating a Modern Observability System” by Ted Young and Austin Parker.
Our goal is to migrate our React Native SDK, making it fully compatible with the OpenTelemetry APIs. This will allow end users to export their data in a flexible way to whichever destination they prefer.
Our approach: Step-by-step implementation
We broke down our goal into manageable stages:
- Analysis: We started by analyzing our existing SDK to understand what we have already built, and what needed to be improved.
- Team formation: We created a dedicated team to instrument Embrace’s existing features for React Native using tools available from the OpenTelemetry community.
Insights from the planning process
During the planning process, the team discovered that there was nothing specific to React Native in the OpenTelemetry community that allows developers to simply “plug and play.” There are JavaScript APIs in the OpenTelemetry project, and instrumentation to support the React framework, but nothing in the project that covered the mobile-specific use cases for React Native. We jumped at the opportunity to contribute by creating a bridge between OpenTelemetry JavaScript APIs and the React Native world.
Our vision: Contributing
We decided to develop instrumentation libraries as a contribution to OpenTelemetry, wholly open-source and not owned by Embrace. Normally, we would create our own components and push them into our own open source projects, but we discussed some key reasons worth mentioning:
- Community benefit: These libraries can be used and tested by others, who can also contribute and improve them.
- SDK integration: Our SDK can then consume these external libraries, making sure to always be aligned with the agreed-upon paradigms of the latest observability systems. Embrace’s implementation can then connect the telemetry data to the Embrace backend by default, but with an important addition: users can redirect their telemetry elsewhere.
- Visibility for Embrace: By contributing to open source, Embrace can be recognized as an important member of the OpenTelemetry community.
- Community demand: People in the community have asked for these libraries! Most mobile apps share certain common functionalities, like navigation and networking, which can be instrumented in similar ways. We believe the React Native community will take real advantage by consuming these libraries after we connect the OpenTelemetry APIs with modern React code, using hooks and functional components.
Seeking feedback from the community
When building our library, we made a few key assumptions about React Native development. We would love feedback on our thought process:
- Focus on features: Most React Native developers focus on improving features and creating new functionalities rather than instrumentation.
- Simplicity: Developers want a simple plug-and-play solution for React Native. Everything related to native components can seem to be kind of complex. From experience, we know a developer’s time is usually allocated to creating new customer-facing flows. This focus often relegates tasks like observability to the end of KTLO lists.
- Abstraction preference: Mobile developers prefer to abstract observability-related code into an external layer rather than in the base code of a project.
Building the instrumentation library
First, we strategized how we could make a contribution. We kept the following goals in mind:
- Identify needs: Not everything needs to be observed. Decide on the key data points. Understand what you need to observe and what kind of telemetry you want to generate. In our case we decided first to observe a simple flow:
navigation
. This will be our first contribution into the OpenTelemetry JS community. - Provide neutrality: Avoid locking the library to a specific provider or exporter. The goal is to provide telemetry data without forcing developers to use a specific vendor. Of course, if you want to keep your data with Embrace, we plan to expose a custom provider which will still allow you to efficiently send telemetry to our backend.
- Provide meaningful insights: Instrumenting a flow doesn’t mean the work is done. Developers need to implement strategies to collect and analyze the data using a vendor that meets their needs.
Okay, we have a reason and a strong idea about what we want to observe. We need to start writing code, but for that, we need to know where and how.
For this, our team looked to the OpenTelemetry community by joining the Special Interest Group (SIG) meetings. We found it useful to jump into the Client Instrumentation SIG and JavaScript SIG meetings every week to stay in the loop and ensure we met the expectations for code contribution.
We also took a look at what was already published in the opentelemetry-js and opentelemetry-js-contrib repositories. While we found one instrumentation library based on React that covers lifecycles for web applications, there was nothing specific for instrumenting app navigation in a mobile environment.
While React and React Native applications both use JavaScript and React’s component-based architecture, their ecosystems, tools, and runtime environments differ significantly. We decided to instrument the navigation flows based on third-party libraries, settling on expo-router, @react-navigation/native, and wix/react-native-navigation.
We had one key goal: to ensure our components used the latest OTel semantic conventions and React conventions, which would make it easy for others to contribute. Hooks, references, and functional components were crucial for us to create a modern React solution.
It was not an easy journey. We encountered some difficulties trying to align with the existing stack when building the solution in the OTel-JS repositories. For example, existing testing in the repos didn’t fit how we developed our contribution, and under the hood React Native actually uses some non-JavaScript elements that conflicted with the tooling. After working through these intricacies, we finally reached our main goal: to open a Pull Request contributing our navigation instrumentation to the OpenTelemetry community.
How can I start using this instrumentation library while I wait for the PR to merge?
The Pull Request is currently waiting to be merged into the contributor repo, opentelemetry-js-contrib
. Feel free to take a look, explore the solution, and give it a thumbs up if you like the initiative!
The development fork is hosted by Embrace and is available for cloning; you can switch to the relevant branch here. Note: If you are just looking for the .tzg
file, we would recommend you jump directly to Step 1 below.
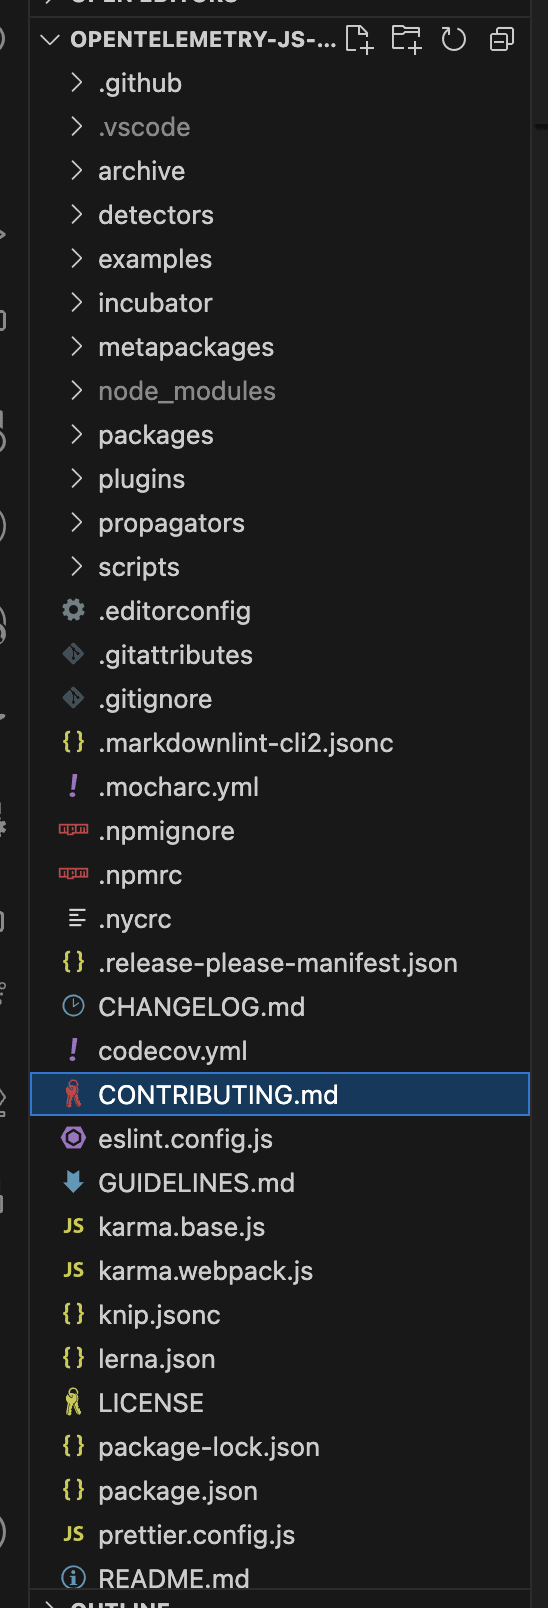
The code in the fork is our version of the open-telemetry/opentelemetry-js-contrib repository. After following all steps in the CONTRIBUTING.md guide, your root structure should look like this:
If you haven’t already done so by this stage, run npm ci
and npm run compile
.
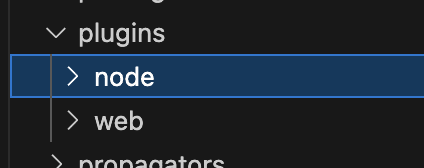
The structure includes three key folders where all OpenTelemetry components are located: metapackages
, packages
, and plugins
. For now, we’ll focus on the plugins
directory, as it hosts our React Native navigation Instrumentation library. Inside plugins
, you’ll find subfolders with various components.
Our component, @opentelemetry/instrumentation-react-native-navigation
, is located in plugins/node/instrumentation-react-native-navigation
.
Navigate into this directory to get started:
cd plugins/node/instrumentation-react-native-navigation
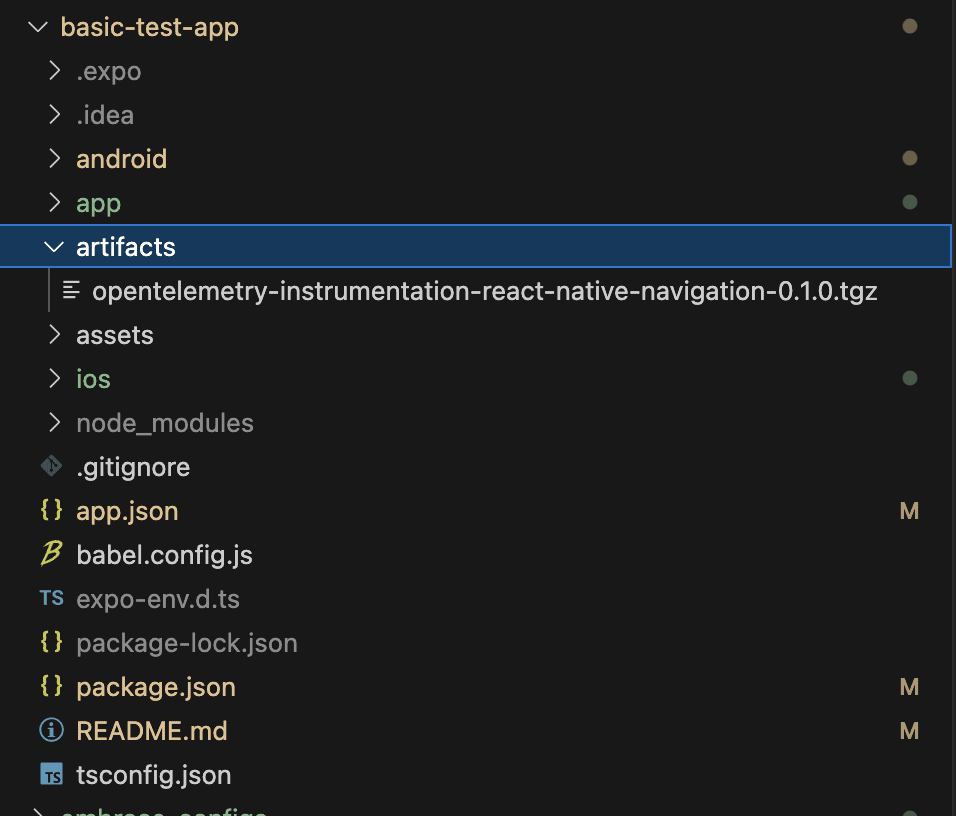
First, explore the library. To keep it simple, we packed the instrumentation library and committed it into a separate branch. From that location, move this .tgz
file to the application you want to instrument.
Then, to install it in the target application, place the .tgz
file in a convenient folder or at the root of the app. You can also place it any other location that you prefer.
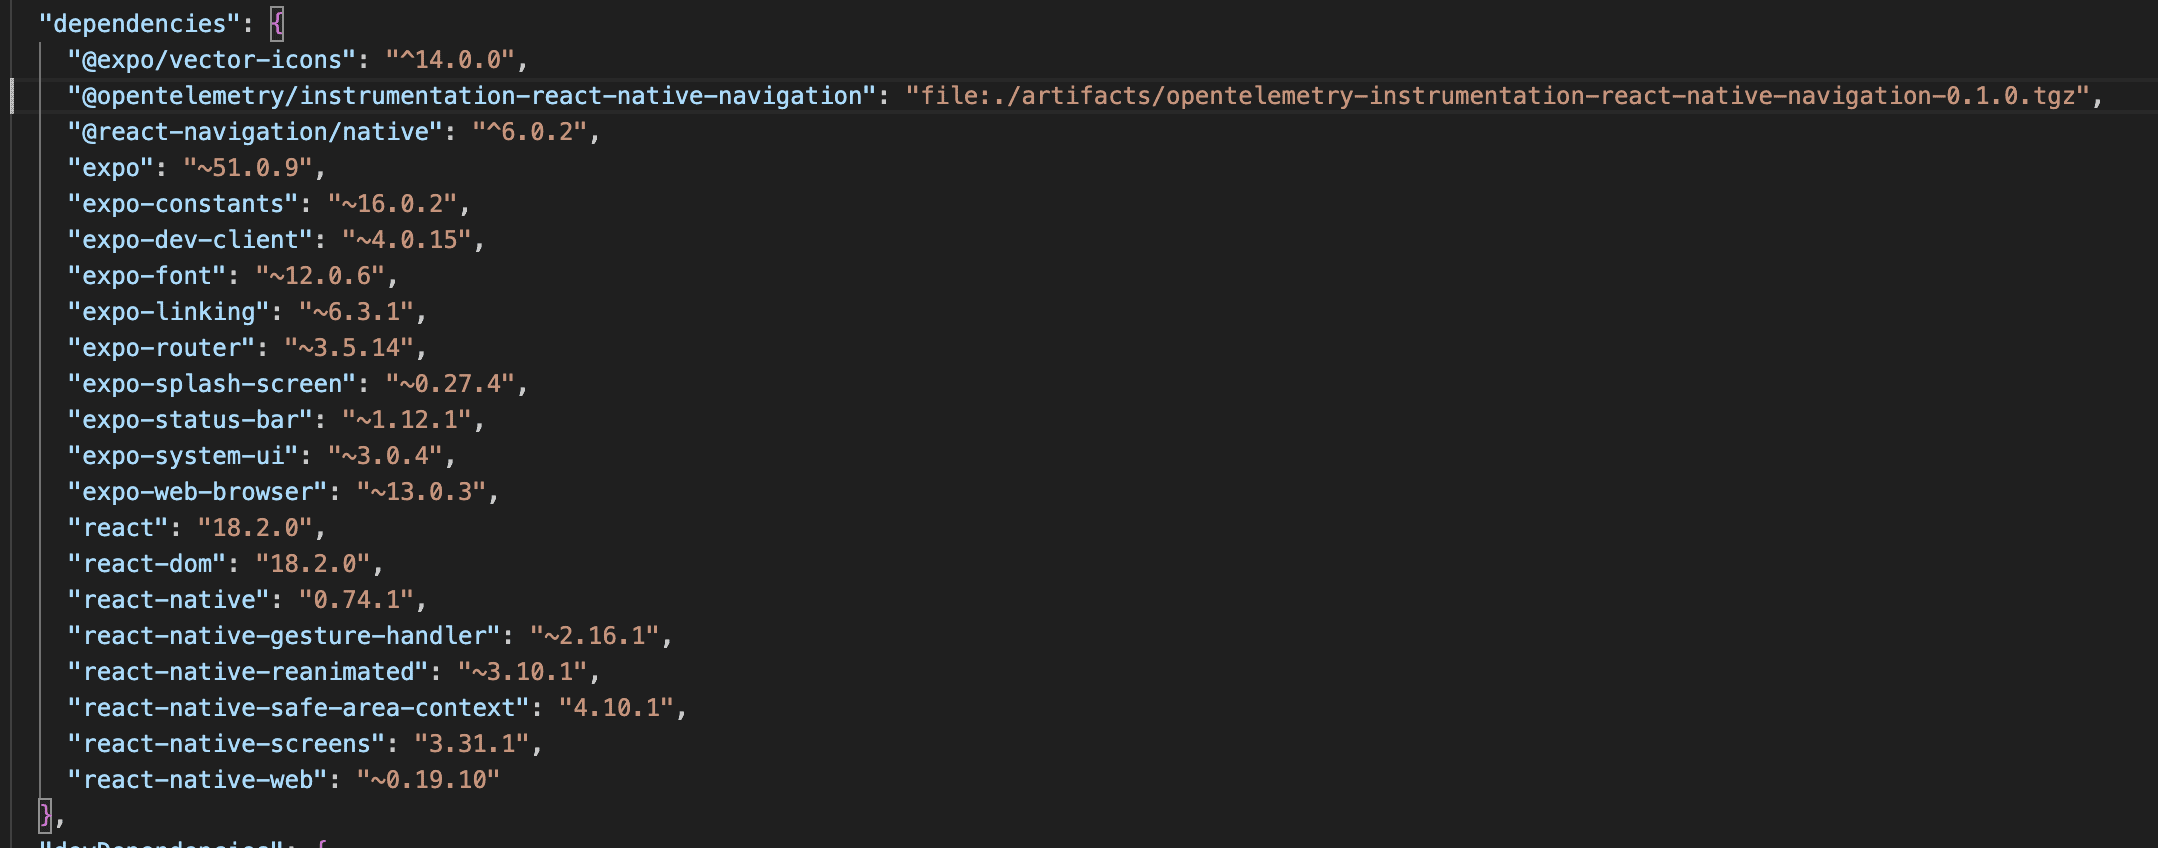
Update the package.json file by adding the following dependency to the dependencies object:
"@opentelemetry/instrumentation-react-native-navigation": "file:./artifacts/opentelemetry-instrumentation-react-native-navigation-0.1.0.tgz",
Your package.json should look like this:
Finally, install the dependency by running:
npm i
# or if you use yarn
yarn
Do not forget to also install the required OpenTelemetry dependency for the package to work correctly:
npm i @opentelemetry/api
# or if you use yarn
yarn add @opentelemetry/api
Time to instrument!
With everything now set up, it’s time to start using the components. For these examples to work correctly, you would also need to install the OpenTelemetry tracing SDK that is available:
npm i @opentelemetry/sdk-trace-base
# or if you use yarn
yarn add @opentelemetry/sdk-trace-base
Expo Router / React Navigation Native
If you are using expo-router or @react-navigation/native you would need to wrap your entire application with the NavigationTracker
component:
import {FC, useMemo} from 'react';
import {Stack, useNavigationContainerRef} from 'expo-router';
import {NavigationTracker} from '@opentelemetry/instrumentation-react-native-navigation';
import {
BasicTracerProvider,
ConsoleSpanExporter,
SimpleSpanProcessor,
} from '@opentelemetry/sdk-trace-base';
// the provider is something you need to configure and pass down as prop into the `NavigationTracker` component
// if you choose not to pass any custom tracer provider, the <NavigationTracker /> component will use the global one.
const provider = new BasicTracerProvider();
const exporter = new ConsoleSpanExporter();
const processor = new SimpleSpanProcessor(exporter);
provider.addSpanProcessor(processor);
// make sure a tracer provider is registered BEFORE you attempt to record the first span.
provider.register();
const App: FC = () => {
// If you do not use `expo-router` the same hook is also available in `@react-navigation/native` since `expo-router` is built on top of it.
// Just make sure this ref object is passed also to the navigation container at the root of your app.
// (if not, the ref would be empty and you will get a console.warn message instead
const navigationRef = useNavigationContainerRef();
// You can also pass a config prop that accepts the `attributes` key. These static attributes will be passed into each created span.
const config = useMemo(() => ({
tracerOptions: {
schemaUrl: "",
},
attributes: {
"static.attribute.key": "static.attribute.value",
"custom.attribute.key": "custom.attribute.value",
},
debug: false, // if set to `true`, it will print console messages (info and warns) for debugging purposes
}), []);
return (
<NavigationTracker ref={navigationRef} provider={provider}>
<Stack>
<Stack.Screen name="(tabs)" options={{headerShown: false}} />
<Stack.Screen name="+not-found" />
</Stack>
</NavigationTracker>
);
};
export default App;
Tip: If you are using the useNavigationContainerRef()
from the @react-navigation/native package, please make sure you wrap what it returns into the proper shape of a reference (e.g., { current: <the useNavigationContainerRef() value> }
). Otherwise, it won’t work as expected and you will see the console.warn message when creating the app instance (when debug mode is enabled).
import {FC, useMemo} from 'react';
import {Stack} from 'expo-router';
import {useNavigationContainerRef} from '@react-navigation/native';
import {NavigationTracker} from '@opentelemetry/instrumentation-react-native-navigation';
import {
BasicTracerProvider,
ConsoleSpanExporter,
SimpleSpanProcessor,
} from '@opentelemetry/sdk-trace-base';
const provider = new BasicTracerProvider();
const exporter = new ConsoleSpanExporter();
const processor = new SimpleSpanProcessor(exporter);
provider.addSpanProcessor(processor);
provider.register();
const App: FC = () => {
// Trick: if you inspect the source code of `useNavigationContainerRef` from
// `@react-navigation/native` you will see that it returns `navigation.current` instead of the entire shape of a reference.
const navigationRefVal = useNavigationContainerRef();
// We need that entire shape here, so we re-create it and pass it
// down into the `ref` prop for the `NavigationTracker` component.
const navigationRef = useRef(navigationRefVal);
const config = useMemo(() => ({
tracerOptions: {
schemaUrl: "",
},
attributes: {
"static.attribute.key": "static.attribute.value",
"custom.attribute.key": "custom.attribute.value",
},
debug: false,
}), []);
return (
<NavigationTracker ref={navigationRef} provider={provider}>
<Stack>
<Stack.Screen name="(tabs)" options={{headerShown: false}} />
<Stack.Screen name="+not-found" />
</Stack>
</NavigationTracker>
);
};
export default App;
If you are using wix/react-native-navigation, you are also able to track navigation changes by importing and implementing the NativeNavigationTracker
component. As mentioned before you would need to wrap the entire application with the exposed component.
import {FC, useRef} from 'react';
import {NativeNavigationTracker} from '@opentelemetry/instrumentation-react-native-navigation';
import {Navigation} from "react-native-navigation";
import {HomeScreen} from "src/components";
import {
BasicTracerProvider,
ConsoleSpanExporter,
SimpleSpanProcessor,
} from '@opentelemetry/sdk-trace-base';
Navigation.registerComponent('Home', () => HomeScreen);
Navigation.events().registerAppLaunchedListener(async () => {
Navigation.setRoot({
root: {
stack: {
children: [
{
component: {
name: 'Home'
}
}
]
}
}
});
});
const provider = new BasicTracerProvider();
const exporter = new ConsoleSpanExporter();
const processor = new SimpleSpanProcessor(exporter);
provider.addSpanProcessor(processor);
provider.register();
const HomeScreen: FC = () => {
// important: make sure you pass a reference with the return of Navigation.events();
const navigationRef = useRef(Navigation.events());
const config = useMemo(() => ({
tracerOptions: {
schemaUrl: "",
},
attributes: {
"static.attribute.key": "static.attribute.value",
"custom.attribute.key": "custom.attribute.value",
},
debug: false, // if set to `true`, it will print console messages (info and warns) for debugging purposes
}), []);
return (
<NativeNavigationTracker ref={navigationRef} provider={provider} config={config}>
{/* content of the app goes here */}
</NavigationTracker>
);
};
export default App;
The purpose of this package is to intercept changes in the navigation of a React Native application and create telemetry data following the OpenTelemetry standards. Every new view displayed will start a new span, which will end ONLY when the next view becomes available to the user.
For instance, when the application starts and the user navigates to a new section, the first span will be considered finished at that moment. Let’s take a look at the output of this span:
{
resource: {
attributes: {
'service.name': 'navigation',
'telemetry.sdk.language': 'nodejs',
'telemetry.sdk.name': 'opentelemetry',
'telemetry.sdk.version': '1.25.0'
}
},
traceId: 'a3280f7e6afab1e5b7f4ecfc12ec059f',
parentId: undefined,
traceState: undefined,
name: 'Home',
id: '270509763b408343',
kind: 0,
timestamp: 1718975153696000,
duration: 252.375,
attributes: {
'view.launch': true,
'view.state.end': 'active',
'view.name': 'Home',
'static.attribute.key': 'static.attribute.value',
'custom.attribute.key': 'custom.attribute.value'
},
status: { code: 0 },
events: [],
links: []
}
If you dig into the attributes, view.launch
refers to the moment the app is launched. It will be true
only the first time the app mounts. Changing the status between background/foreground won’t modify this attribute. For this case the view.state.end
is used, and it can contain two possible values for Android: active
and background
. A third value is available for iOS: inactive
. (For more information about this, you can visit the official React Native – App States documentation.)
Both components (<NavigationTracker />
and <NativeNavigationTracker />
) are built on top of third-party libraries and function according to the respective APIs exposed by those libraries.
Since the implementation of <NavigationTracker />
relies on @react-navigation/native
and expo-router
, add the state
listener to detect changes during navigation. <NativeNavigationTracker />
leverages the capabilities of wix/react-native-navigation
, internally implementing the registerComponentDidAppearListener
and registerComponentDidDisappearListener
methods provided by the library.
Wrapping up
This navigation library is only the first of the React Native contributions we’d like to make to OpenTelemetry! Please give it a try and let us know how well it works, and if it has any rough edges to sort out in your app.
If you’d like to learn more about mobile observability with OpenTelemetry, please join our community Slack and ask questions! Also be sure to check our website and blog for more writing and features about OpenTelemetry.
Grab your copy of this guide for practical, actionable advice to build and maintain SLOs that keep end users and engineers happy.
Download guide